Projects
Construct Badge
Overview
The Construct Badge is an electronic badge, to be worn at the Construct, RIT's on-campus makerspace. At the Construct, one of the things new employees must do is make their own badge, to make sure that everyone knows how to use the machines. Generally, this is done by laser cutting one out, but I decided I wanted yet another project to sink time into, so I decided to make an electronic one.
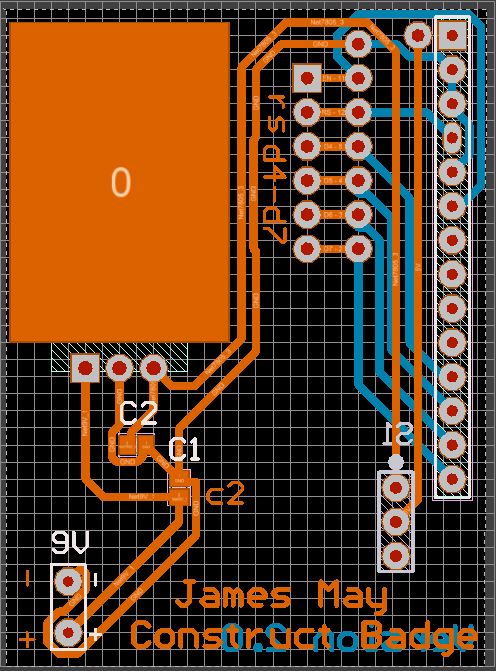
The PCB mill in the Construct was present but nonfunctional, so this project included getting that working, designing a PCB around the machine's (barely passable on a good day) tolerances, and manufacturing/assembling the PCB.

Specifications
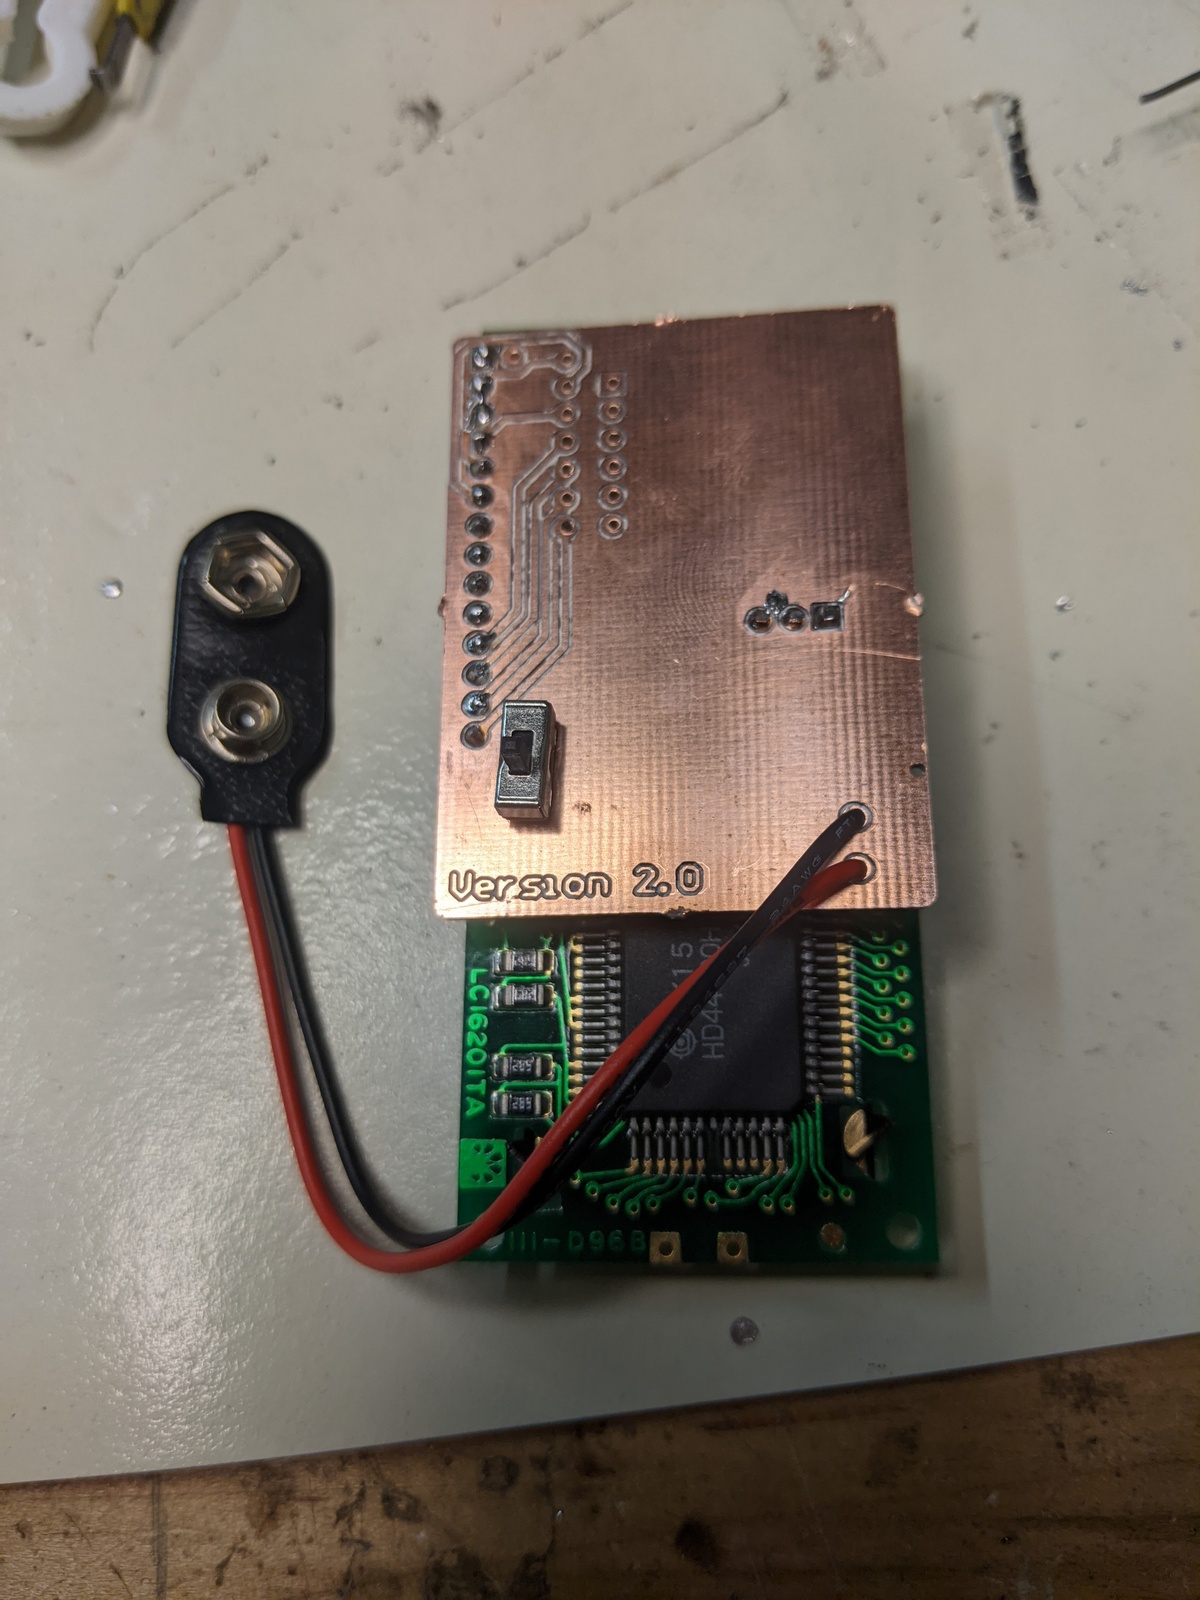
- Power: 9V battery, dropped down to 5V via 7805 Regulator
- Display: LCD1602 Module
- Microcontroller: Arduino Uno (For Programming LCD1602)
- PCB Material: Copper Clad Laminate FR4
- Constraints: Must be manufacturable on the PCB Mill, must only use parts from The Construct
Design Process
Going into this project, I pictured a self contained badge, controlled by an ATtiny85 integrated into the PCB that controlled the output on the screen. As it turns out, 1602LCD modules require a lot of I/O pins, more than my little ATtiny had available. My first thought was to upgrade to a more powerful microcontroller, but I wanted to do this project entirely with components found in The Construct, so I had to find an alterative solution. After reading the datasheet for the controller on the 1602 screen, I found that once it has had data written to it, it will hold whatever is on the screen, so long as it stays powered on. This gave me an idea. By using an Arduino Uno to program the text onto the screen before putting it on, I could have the screen display my name without any control from a microcontroller whatsoever. I went forward with this idea, and wrote a quick Arduino sketch to load my name and title onto the screen.
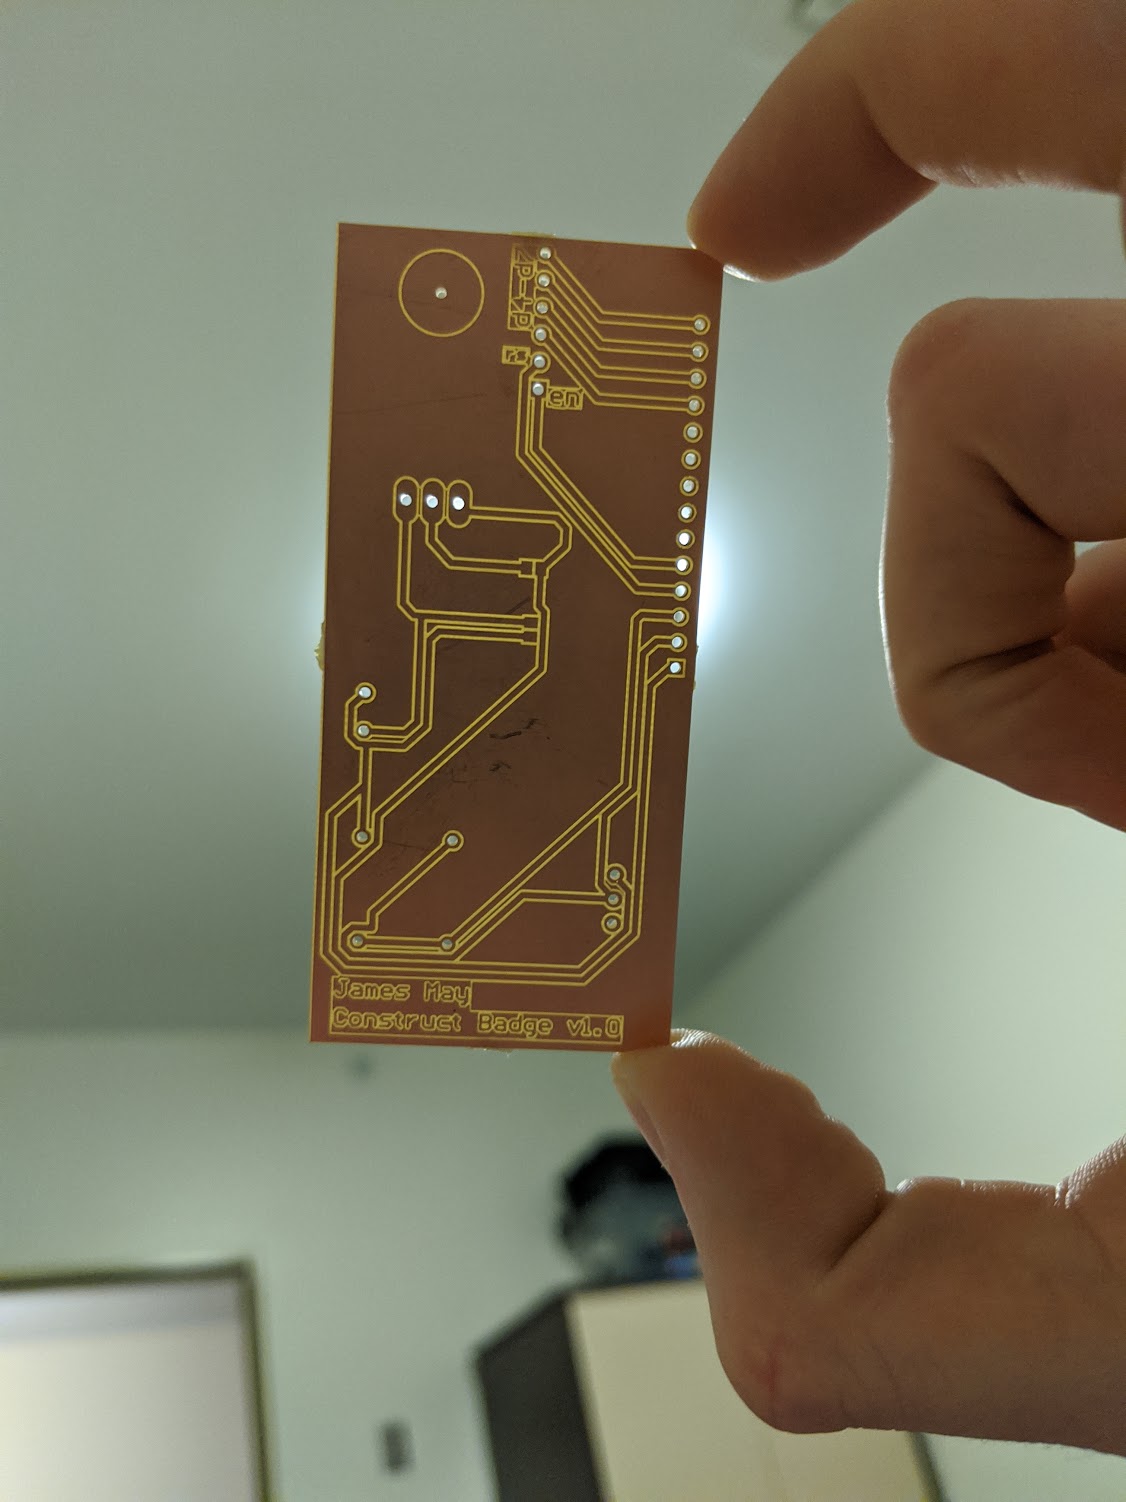
The PCB mill had it's own set of challenges. It required a lot of TLC to get running again, and I had to teach myself PCB design, how to transfer a Gerber file into gcode, and how to load gcode onto a machine with minimal at best documentation. In the end I had a good workflow set up: Circuitmaker to design the PCB, FlatCAM to turn the gerber file into gcode, and Universal Gcode Sender (UGS) to run the mill itself. I had one failed version where I over estimated how accurate the mill was, but after that, I was churning out usable PCBs.
Manufacturing & Final Results
In the end the PCB mill got up and running, and I was able to successfully build a badge. Once I got it done I realized that with the screen I had chosen & the 9V battery, it was much too heavy to be used as a badge. So while the end result did work, I decided not to use it.